
 Cal. No. U60*
 Refine your search
U60*
Adjusting the time and calendar manually
Setting the calendar of the digital section manually
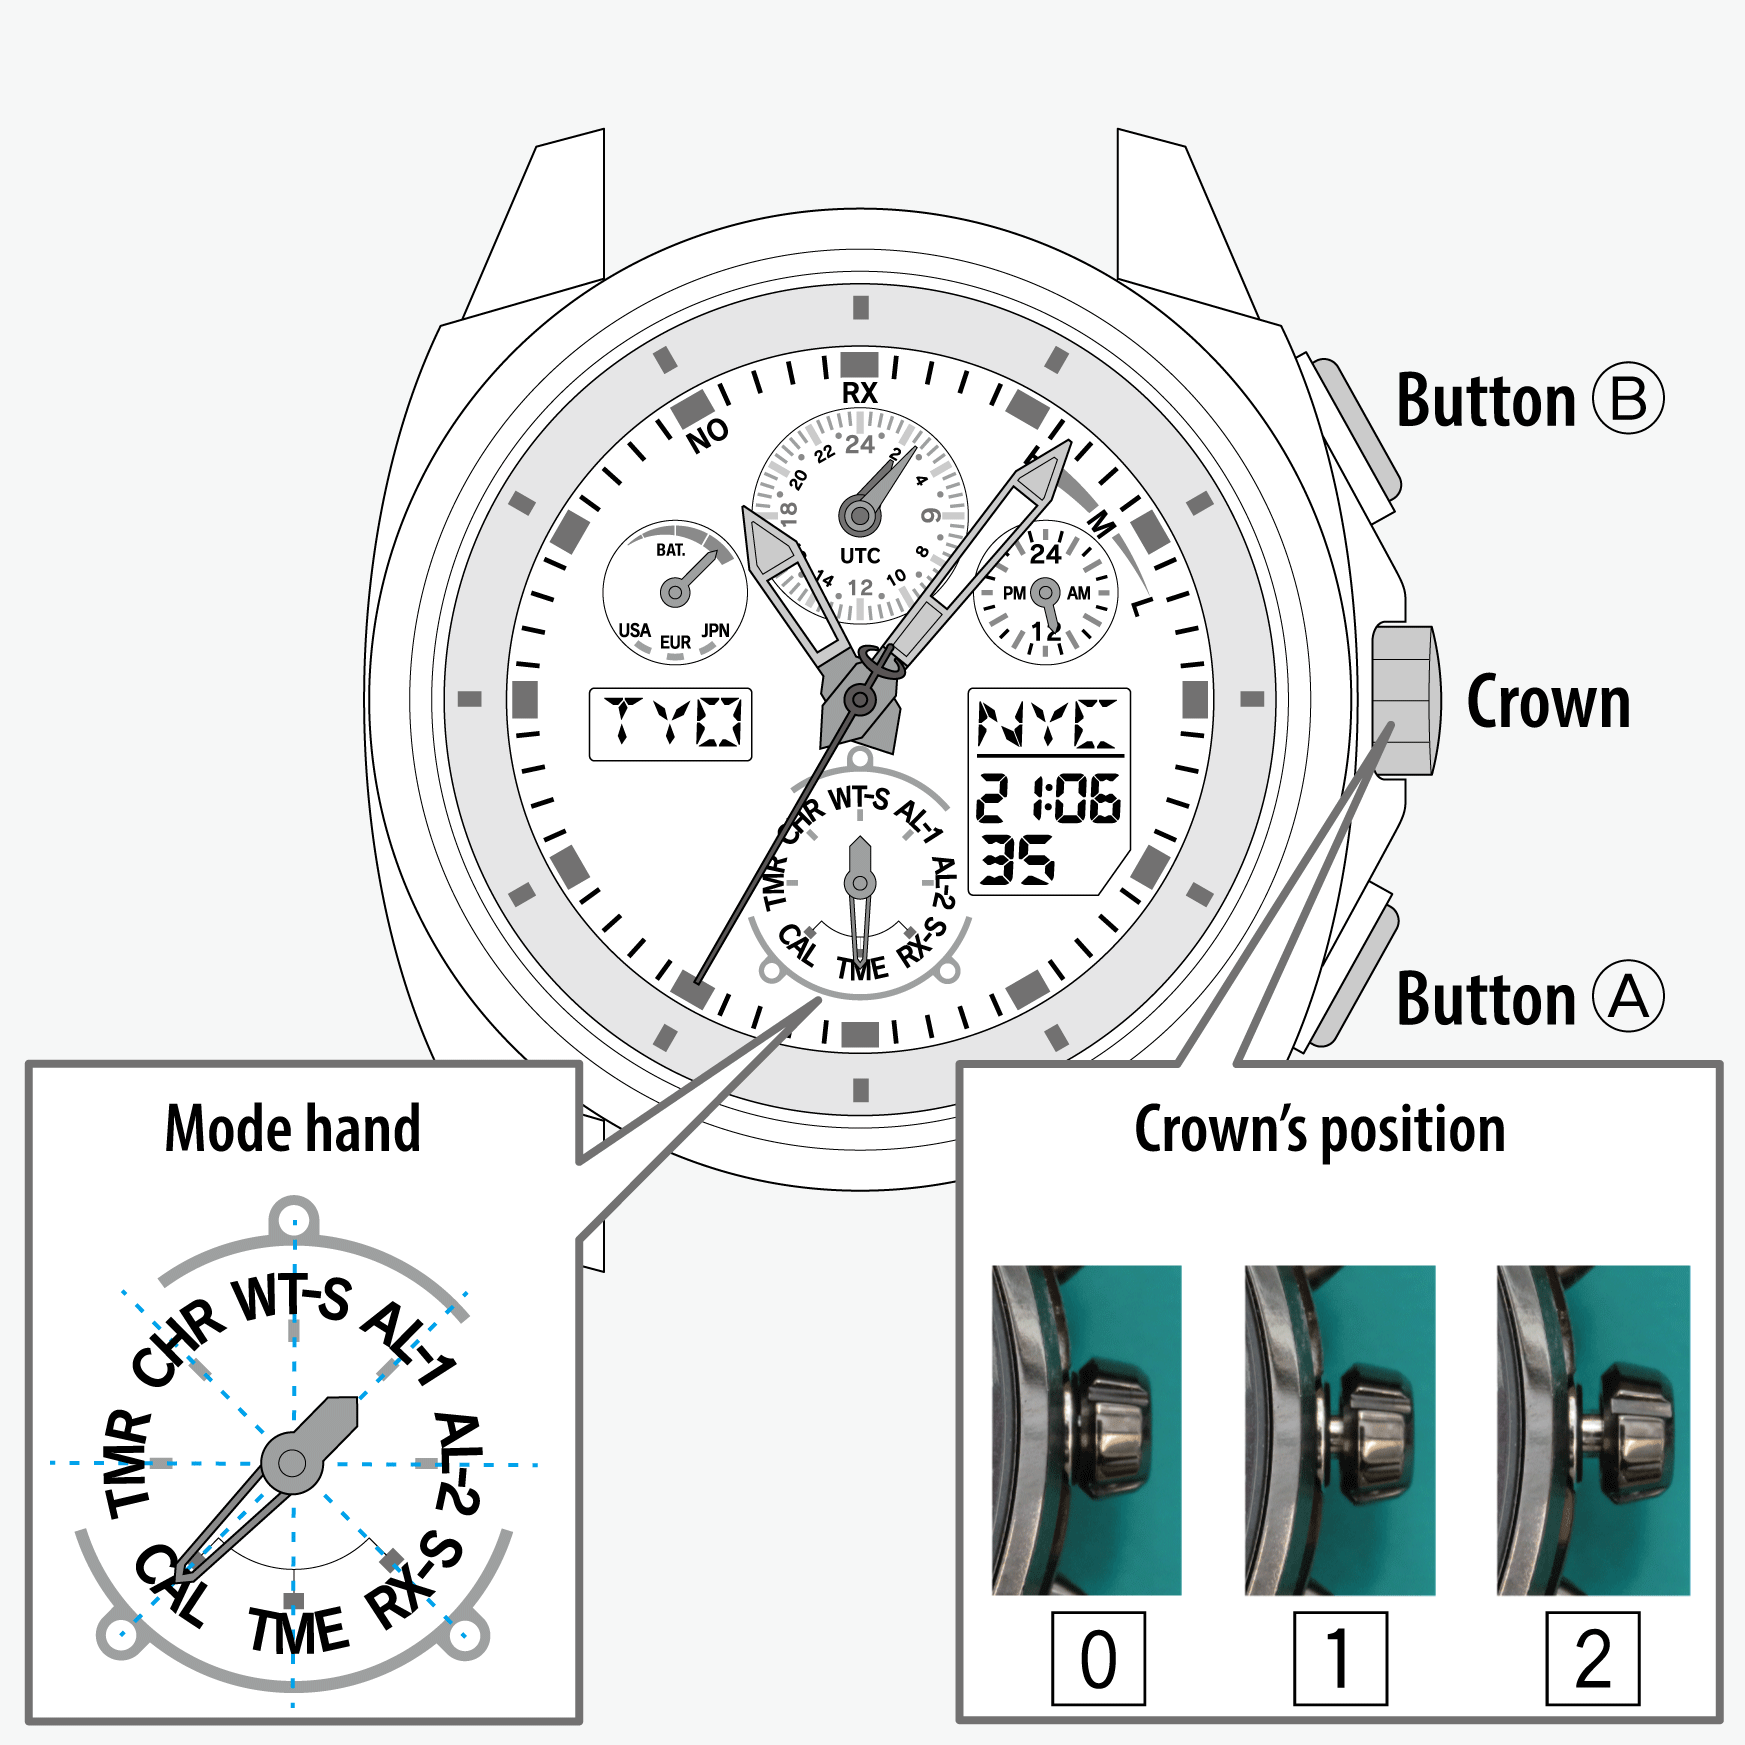
- Pull the crown out to position 1.
- Rotate the crown to set the mode hand to [CAL].
- Press and release the upper right button B or the lower right button A repeatedly to choose an area for which you can find correct date.
- Pull the crown out to position 2.
- Press and release the upper right button B repeatedly to change the target to set.
- Adjusting the calendar
- Push the crown in to position 0 to finish the procedure.
An area name and “(M)” appear alternately on the digital indication (L).
!
Turn the crown so that the mode hand will point to the center of the mode name securely.
The area indication on the top of the digital indication (R) changes and the time and calendar of the indication change correspondingly.
!
Each time you press the button, area indication changes in the order on “Table of time zones and representative places”.
!
Pressing and holding the button changes area names continuously. Press any button to stop changing.
“Month” starts blinking on the digital indication (R).
!
Each time you press the upper right button B, the target changes and blinks as follows:
Month -> date -> year -> (back to the top)
| Target to set | Operation |
|---|---|
| Month | Use the crown to adjust it. |
| Date | Use the crown to adjust it. When month-date combination is wrong, they will be set to the next possible combination after finishing setting. |
| Year | Use the crown to adjust it. 2000 - 2099 are covered. |
!
When you rotate the crown quickly a few times, the indication will move continuously.
To stop the rapid movement, rotate the crown in either direction.
!
Days of week are automatically set based on the calendar set above.