
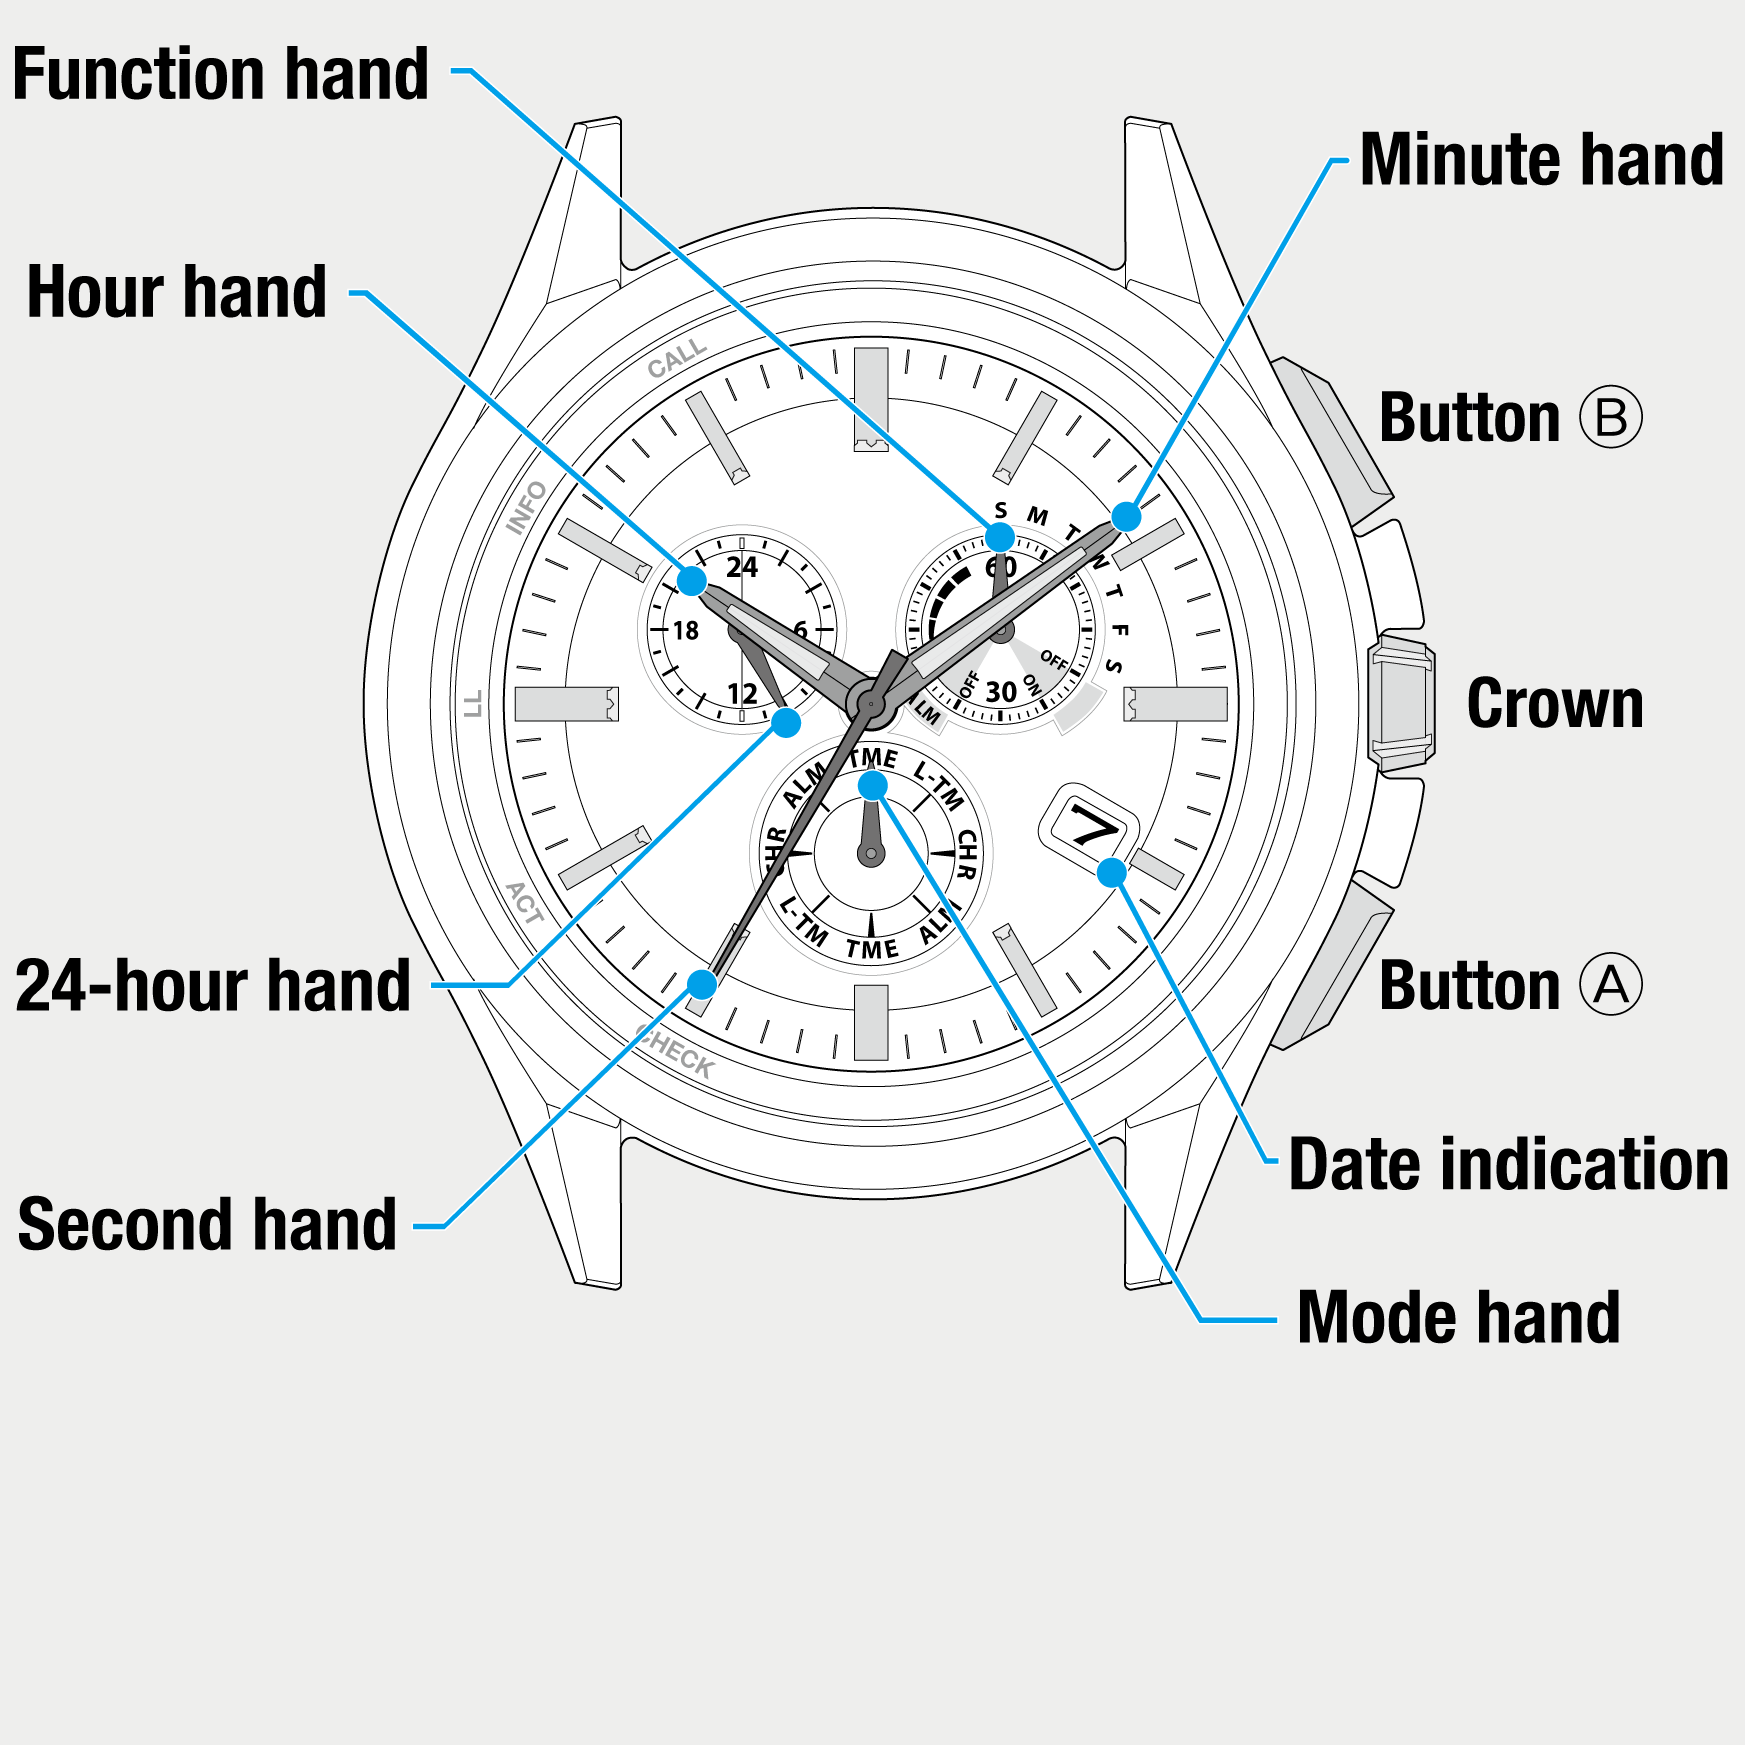
 Cal. No. W770 Riiiver
 Refine your search
W770 Riiiver
Setting functions of the watch on the dedicated app
“Light Level” screen
You can see the record of power generation amount of the watch in a line graph on the “Light Level” screen.
You can change the period indicated on the screen between “Day” (hourly indication in a day), “Week” (hourly indication in a day of week) and “Month” (daily indication of a month) by using the slider on the top of the screen.
- Data of power generation amount are stored in the dedicated app.
- Data storing period of the power generation amount varies depending on storage space your smartphone.
- Past power generation data is removed if you remove the dedicated app.
- Tap
 on the home screen of the dedicated app.
“Day”: a line graph of hourly power generation amount of the current day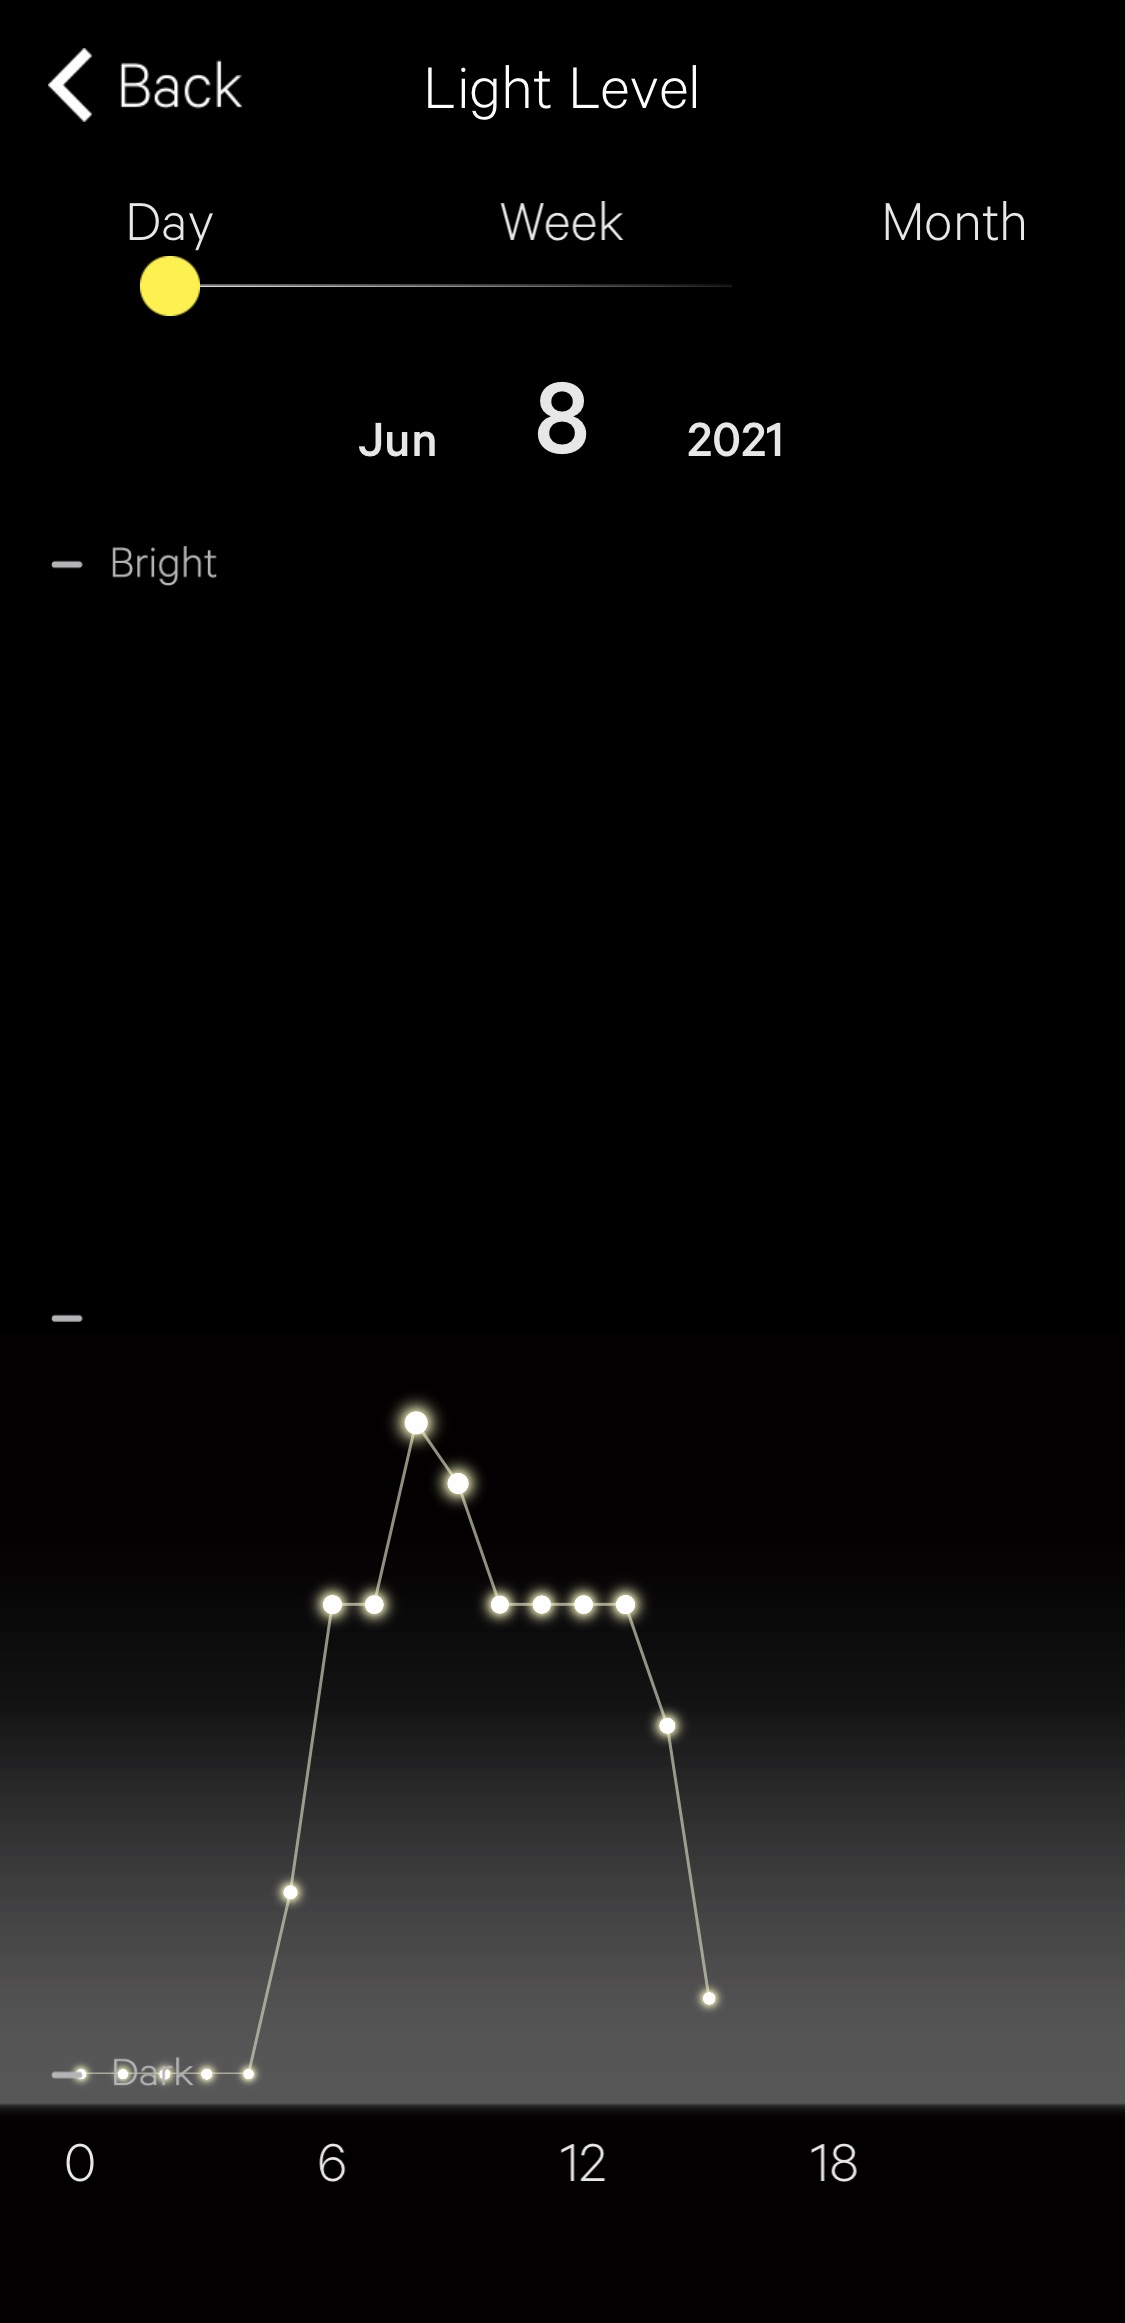
“Week”: line graphs of hourly power generation amount of a day of last 7 days
!
When you chose “Week”, another slider for switching daily indication of the latest seven days is also appears.
!
When you move the slider on the top of the screen to “Month”, daily power generation amount is indicated in a line graph and the weekly total amount in horizontal bar graphs.
“Month”: graphs of monthly power generation amount
“Local Time” screen
You can adjust the setting of local time on the watch.
!
Connection with the watch is needed.
- Pull the crown out to position 1.
- Rotate the crown to change the mode to [L-TM].
- Push the crown in to position 0.
- Tap
 on the home screen of the dedicated app.
 - Adjust the setting of local time.
- Tap the icon on the top of the “Local Time” screen (send icon) after finishing adjustment.
The second hand points to 30 seconds and stops.
The local time currently set is displayed.
!
Press the lower right button A repeatedly to indicate day of week when the function hand does not show it.
The “Local Time” screen is displayed.

 |
The local time currently indicated, place, time, time difference from UTC are indicated here. Tap the time difference from UTC to choose it directly. |
|
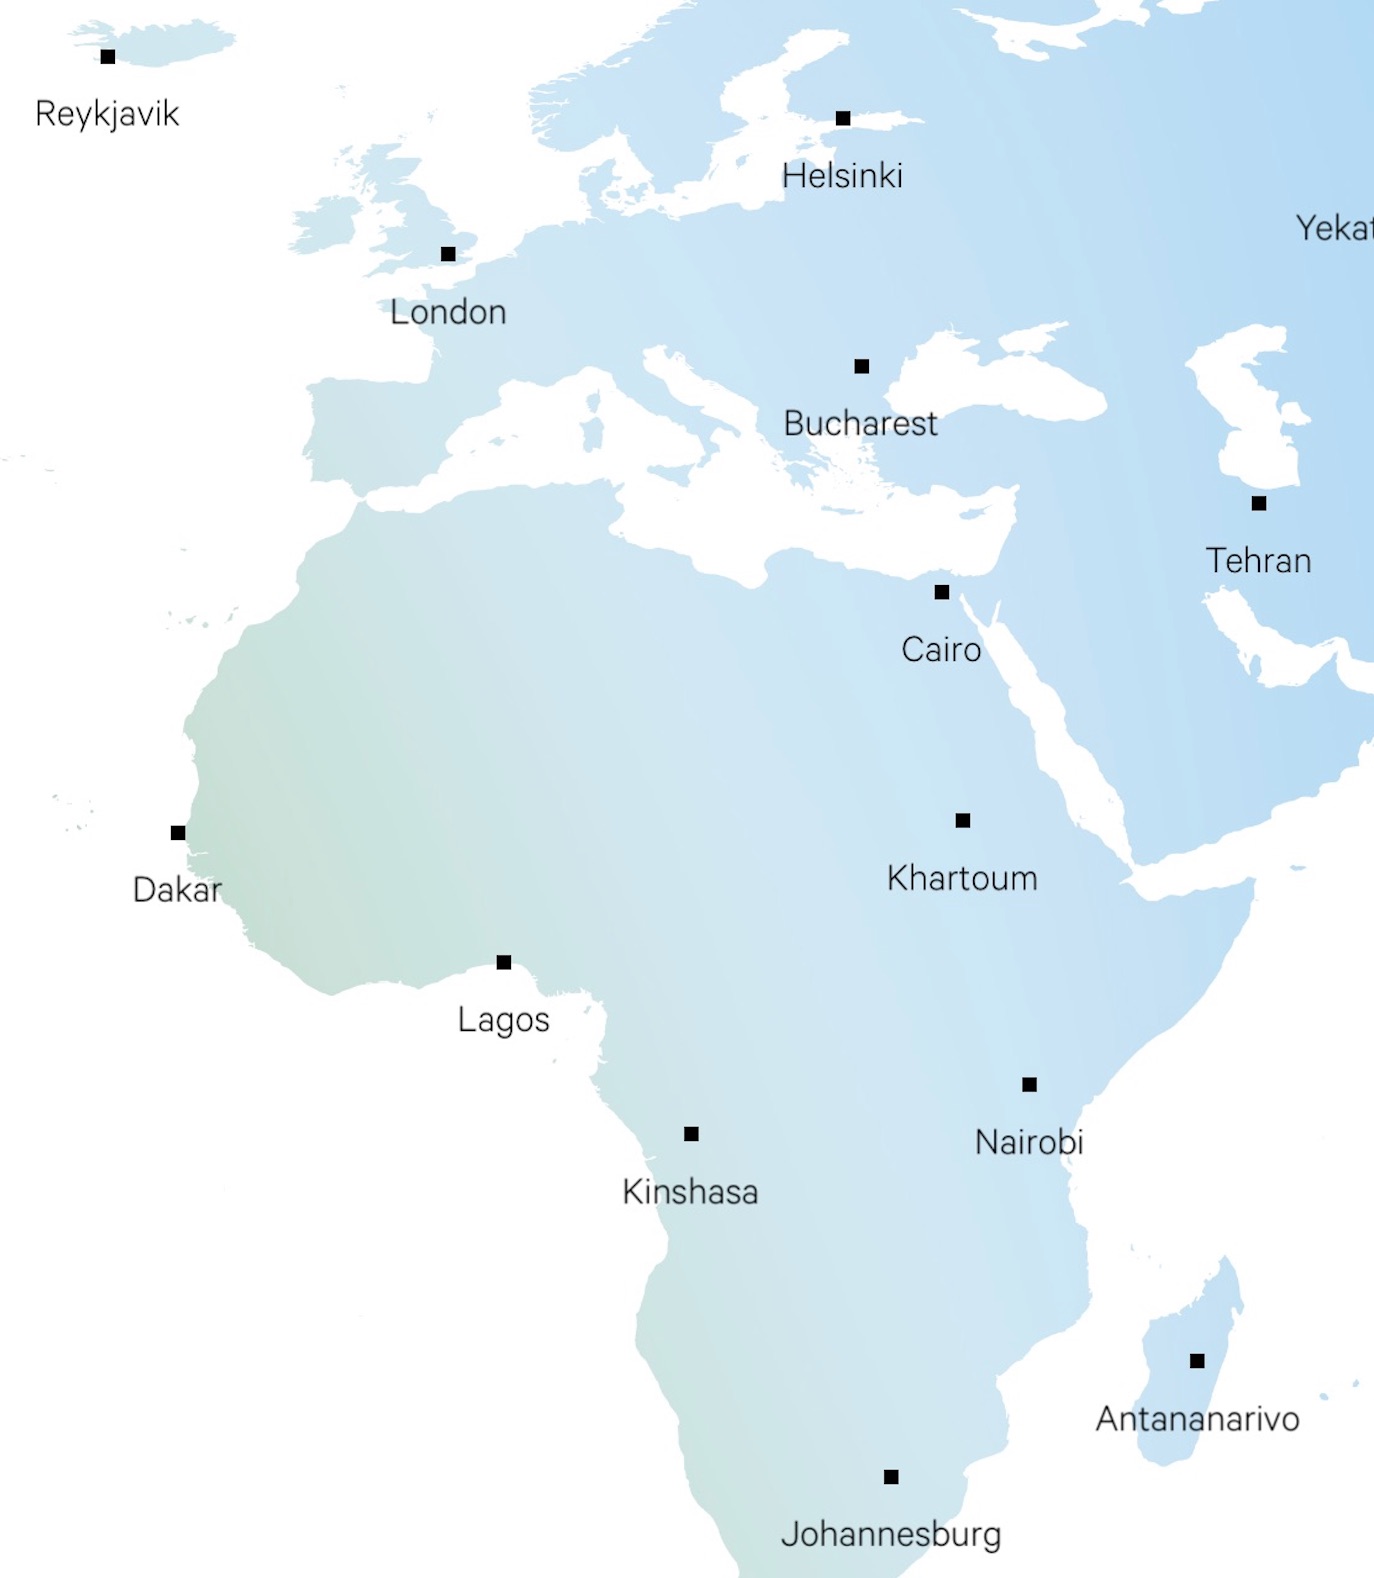 |
Scroll the map sideway and tap an area to set a time zone. | |
 |
Tap here to select an area using location information of the smartphone. | |
 |
Tap here to search by place name. |
 |
The color of the send icon turns blue as modification information can be sent to the watch. |
The adjusted settings are sent to the watch.
“Alarm” screen
You can adjust the setting of the alarm function of the watch.
!
Connection with the watch is needed.
- Pull the crown out to position 1.
- Rotate the crown to change the mode to [TME].
- Push the crown in to position 0.
- Tap
 on the home screen of the dedicated app.
 - Changing alarm setting
- Tap the icon on the top of the “Alarm” screen (send icon) after finishing adjustment.
The second hand points to 30 seconds and stops.
The “Alarm” screen is displayed.
Screen when alarm is in use 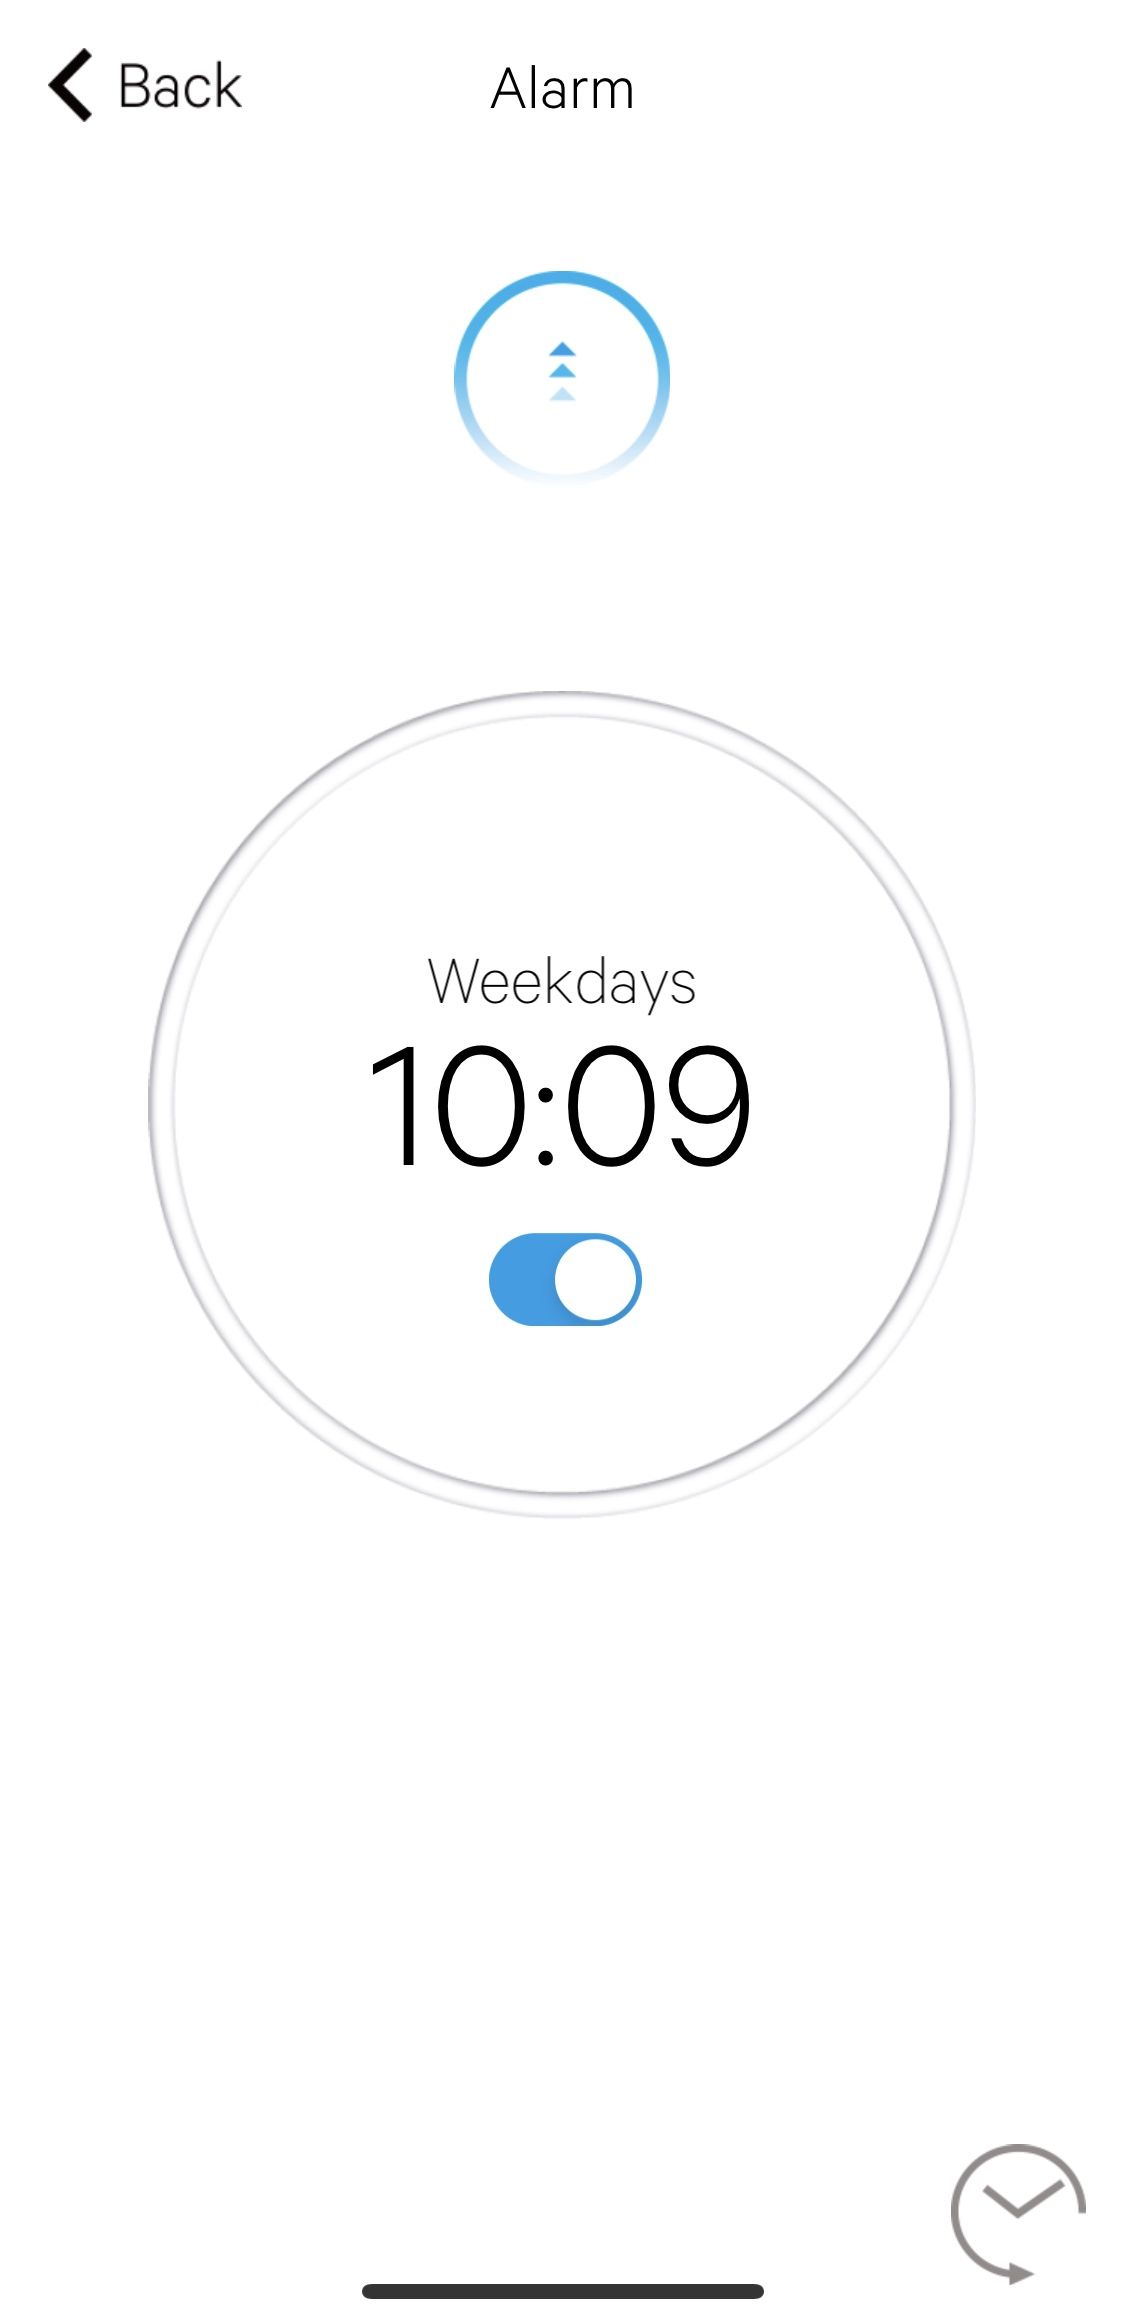
Screen when alarm is not in use 
 |
Tap here to set an alarm time anew. | |
 |
Use this to turn on/off alarm. | |
 |
Use this when you select an alarm time from its setting history. |
Alarm time setting screen 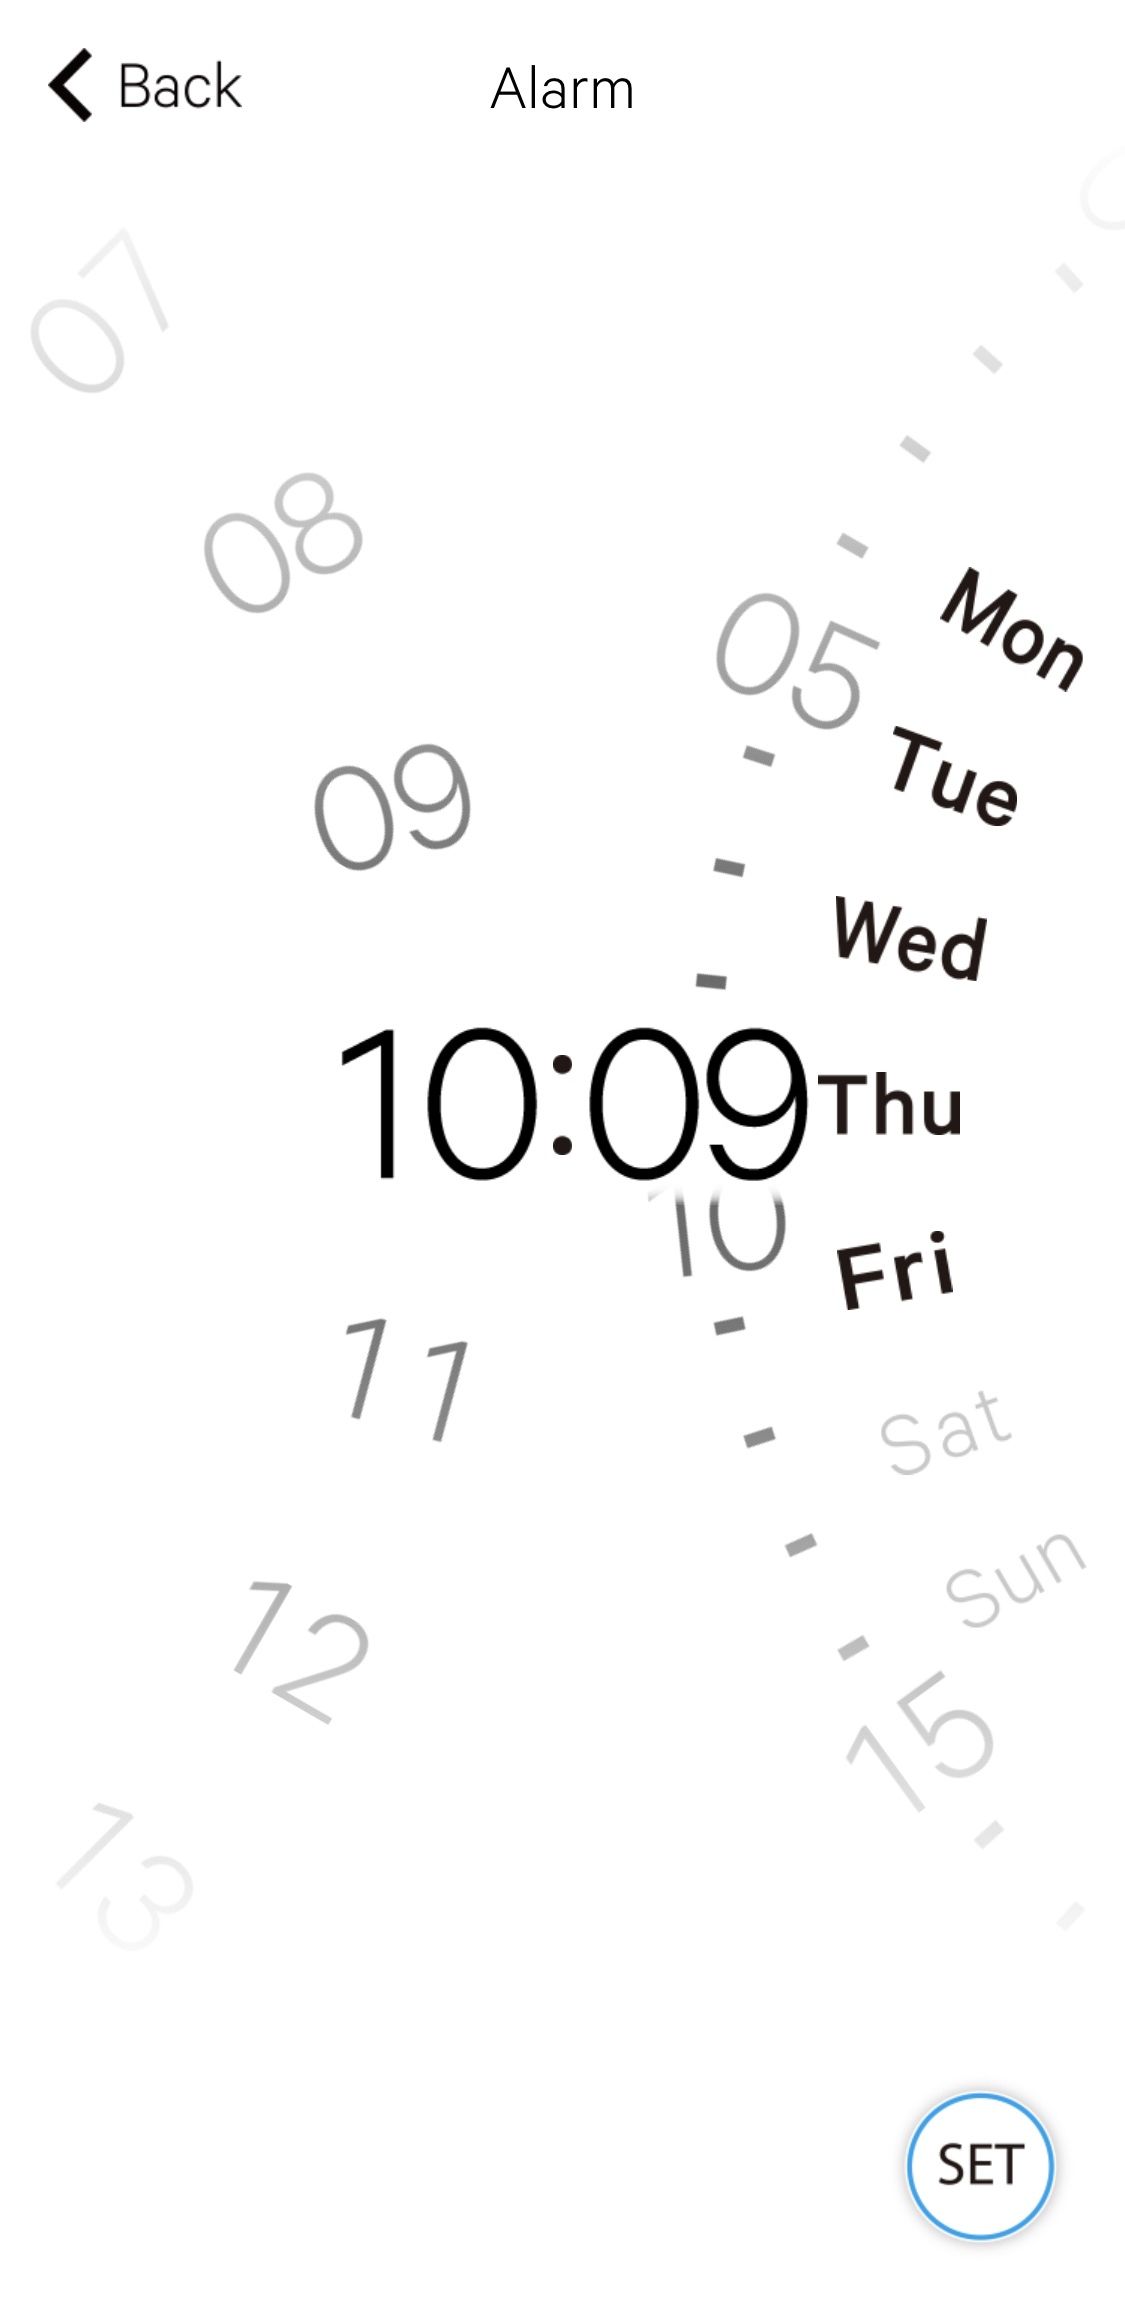
 |
Tap here to cancel alarm time adjustment (new setting is ineffective). | |
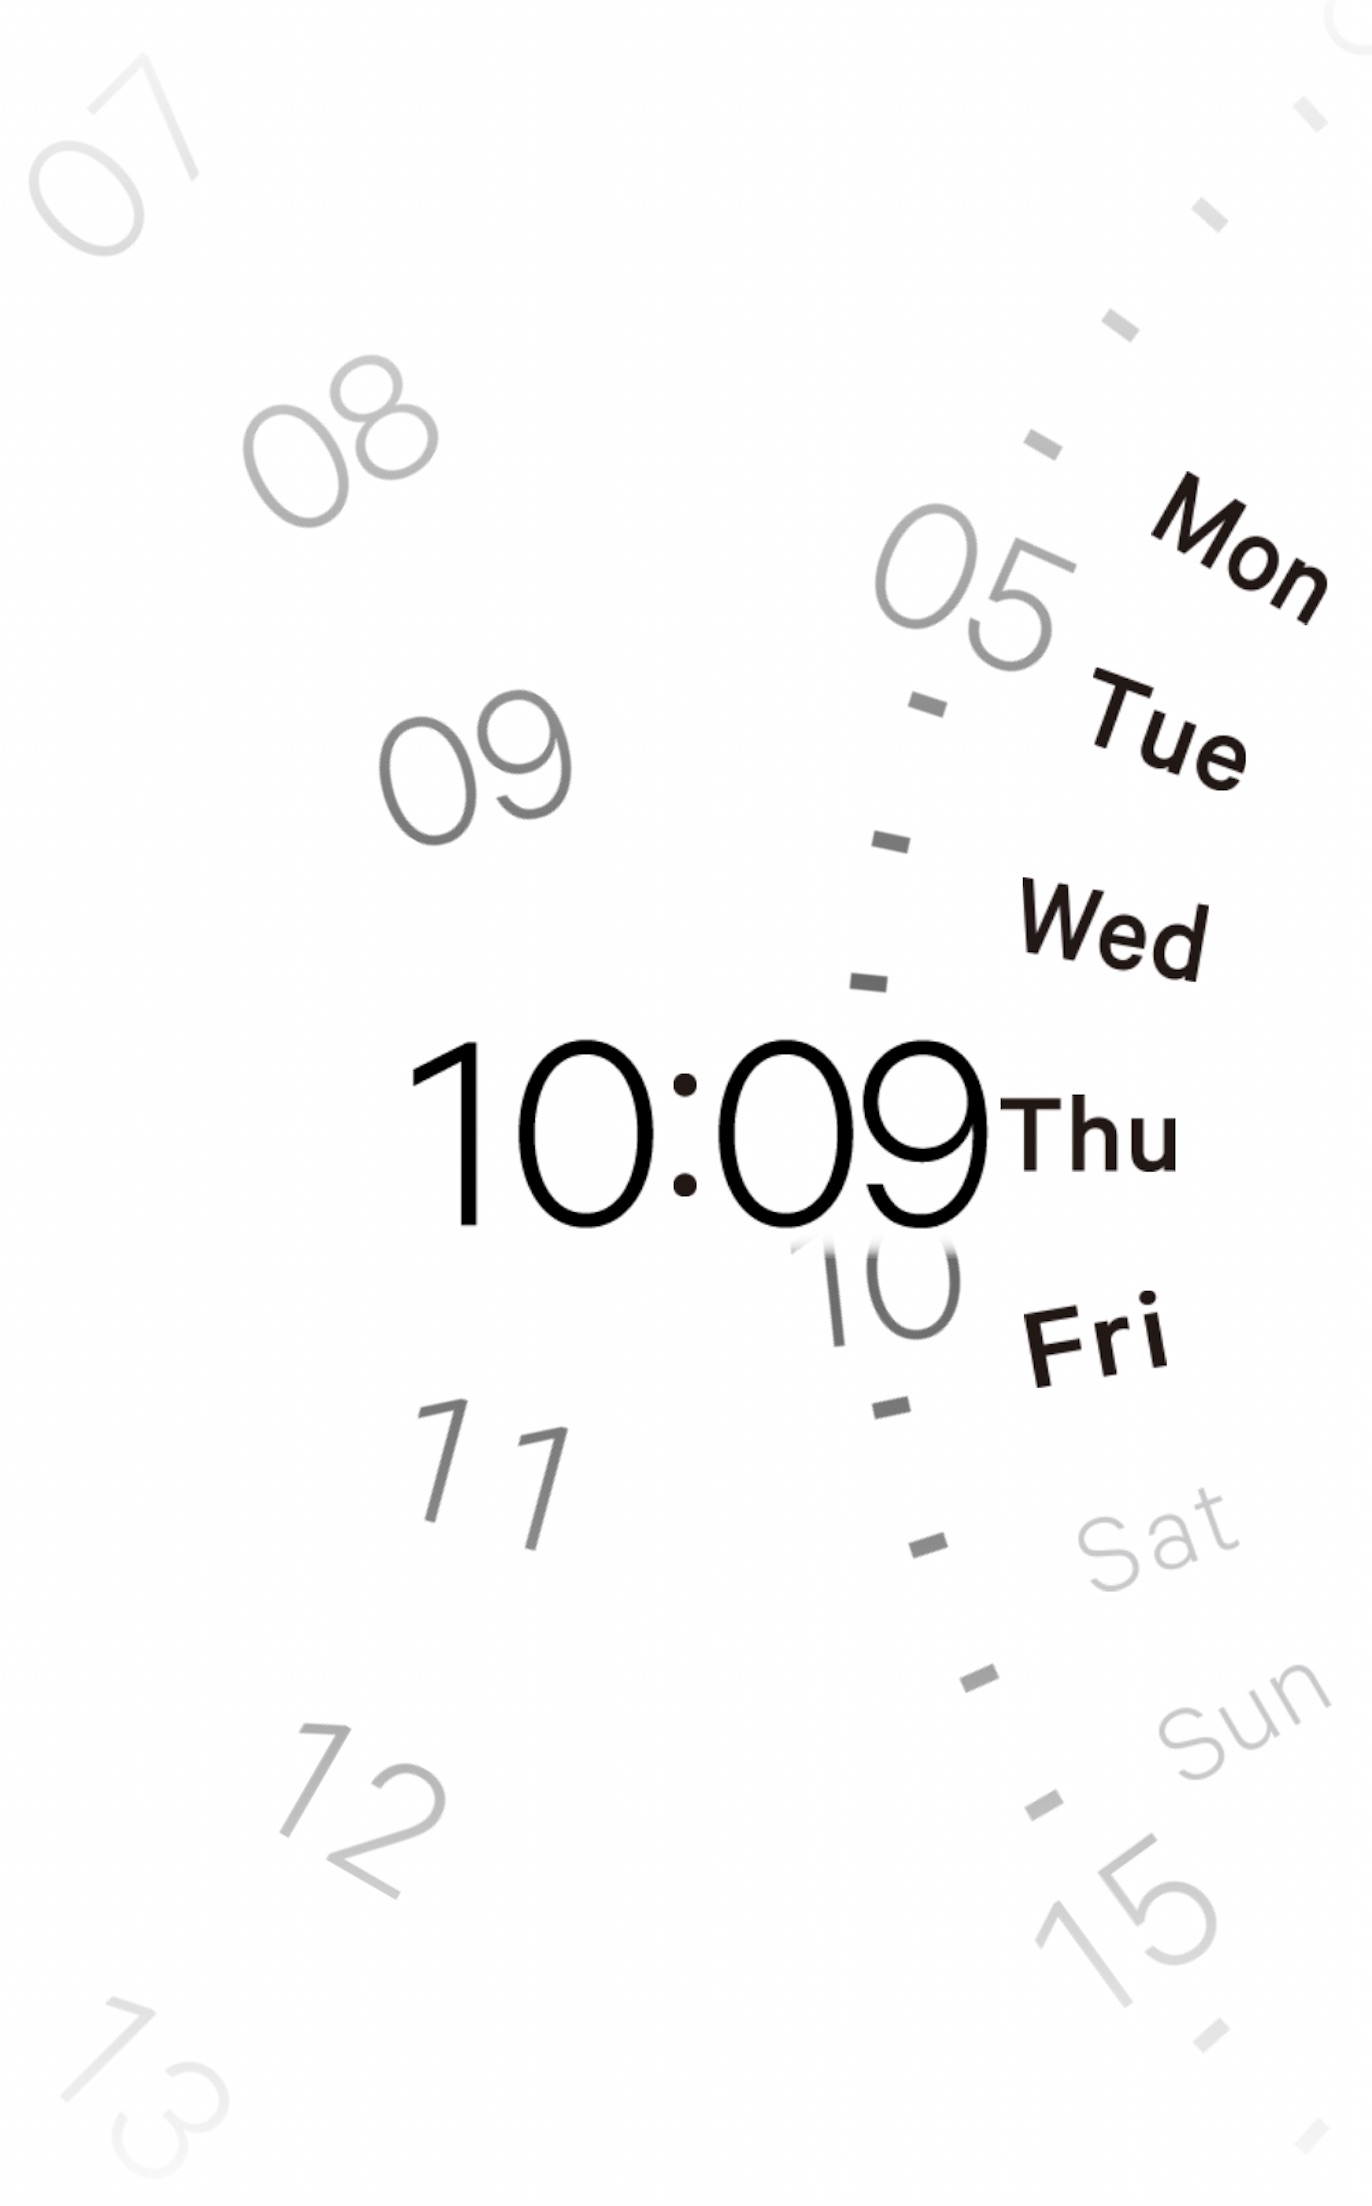 |
Move dials up/down to set an alarm time. Tap days of week on which you want to activate alarm. |
|
 |
Tap here after finishing alarm time setting. |
!
The example above shows the setting that the alarm sounds at 10:09 AM from Monday to Friday every week.
 |
The color of the send icon turns blue as modification information can be sent to the watch. |
The adjusted settings are sent to the watch.